Connection Methods
Spike Recorder Connection Methods
Choosing a connection method depends on your SpikerBox and the device running Spike Recorder.
USB Connection
Use USB when both your device and platform support a USB connection.
USB is usually the preferred connection method for newer Backyard Brains devices because Spike Recorder can recognize the device directly.
Open the Spike Recorder app, plug in the USB cable, and turn on the SpikerBox.
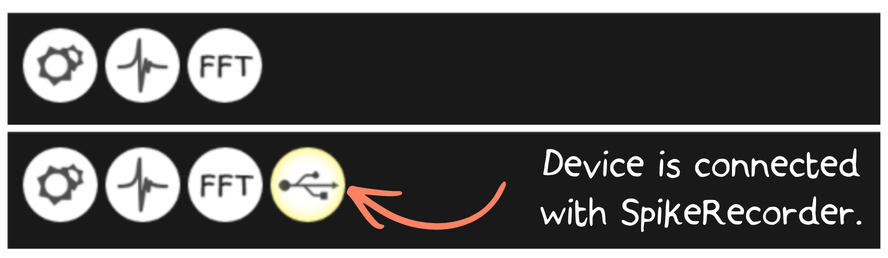
When connected by USB, Spike Recorder displays a USB/device button near the top-left area of the interface. A highlighted outline around the button indicates that the device is connected.
Green “Smartphone” Cable Connection
Use the green “smartphone” cable for devices with a combined headphone/microphone port, such as many laptops and older phones or tablets.
The green cable is directional. The end labeled “SpikerBox” must go into the SpikerBox. The other end labeled “Smartphone” goes into the phone, tablet, or computer.
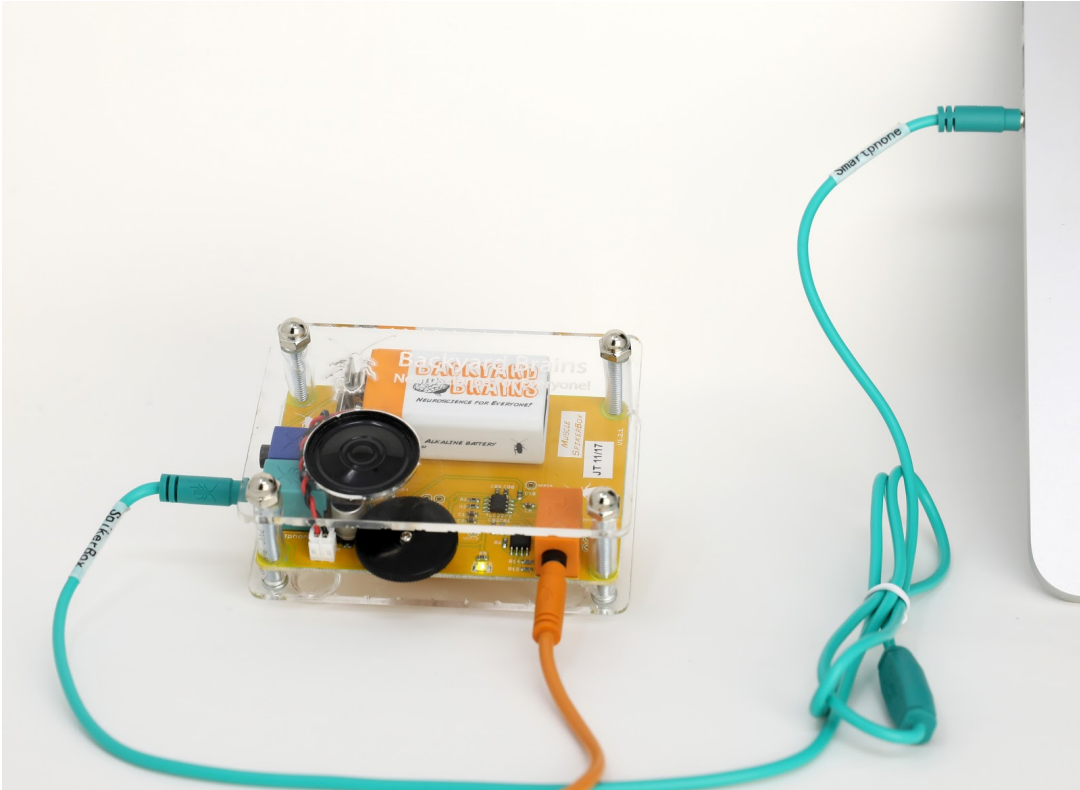
Note: A generic audio cable will not work. Direct connection to a phone, tablet, or computer through the analog microphone input requires the proper custom cable because the cable routes the SpikerBox signal into the device’s microphone input.
On older versions of iOS and Android devices, the device usually connects automatically when using the analog cable.
On desktop, you may need to manually select the correct audio input in Spike Recorder.
After plugging in the green cable:
- Open the Config menu by clicking the small gear icon in the top-left corner.
- Look below the filtering options.
- You should see a list of available audio input devices.

Each input device has a dropdown menu on the left side. This menu controls two things for that input channel: the graph color and whether the channel is active.
Select a visible color, such as green, for the external audio input connected to the SpikerBox.
Select black for any input channels you want Spike Recorder to ignore, such as the computer’s built-in microphone or webcam microphone.

Blue “Laptop” Cable
Use the blue cable for computers with separate headphone and microphone ports.
Plug the signal into the microphone input, not the headphone output.
Setup in Spike Recorder is otherwise similar to using the green “smartphone” cable:
- Open the Config screen.
- Select the correct audio input channel.
Connecting to Other Software
If you are using the blue or green cable to connect your SpikerBox, you can use any program that records audio, such as Audacity.
Keep in mind that the Plant SpikerBox, Heart and Brain SpikerBox use amplitude modulation (AM) with a 5 kHz carrier signal. Spike Recorder automatically removes this carrier signal.
If you are connecting via USB, you can also load the data directly into your own program. Here are a few resources for setting up your own host software: