The Spiker:bit

What is the Spiker:bit?
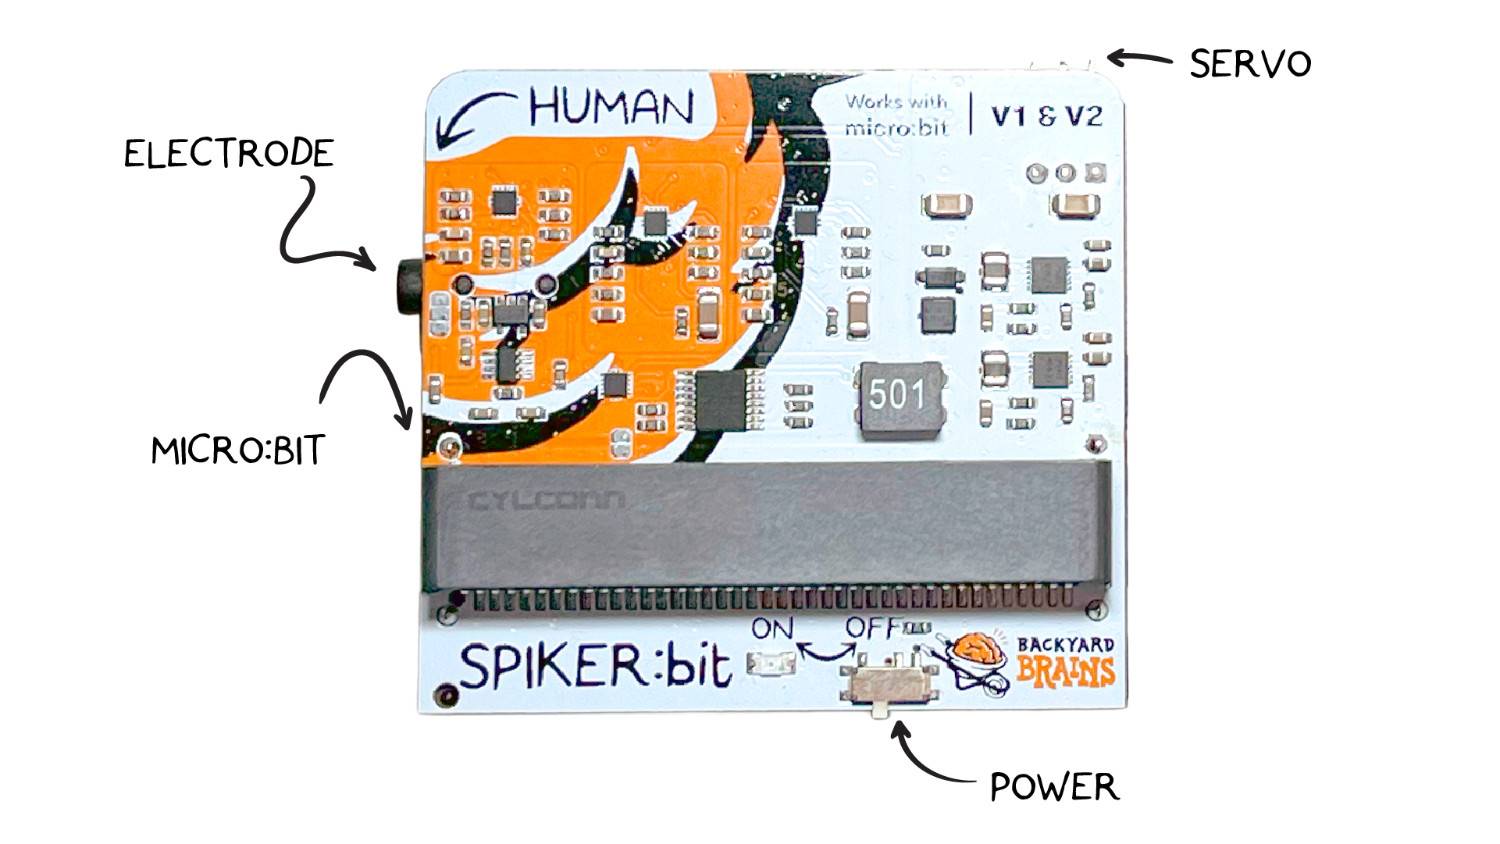
The Spiker:bit is an expansion board for the micro:bit that allows you to develop DIY Brain Machine Interfaces (BMI), also known as Brain-Computer Interfaces (BCI). A BMI is a computer that interfaces directly with the electrical signals of your body. The Spiker:bit has a port to connect to a micro:bit (computer) and a port to record EMG (muscle), ECG (heart), or EEG (brain) signals from your body.
Technical Specifications
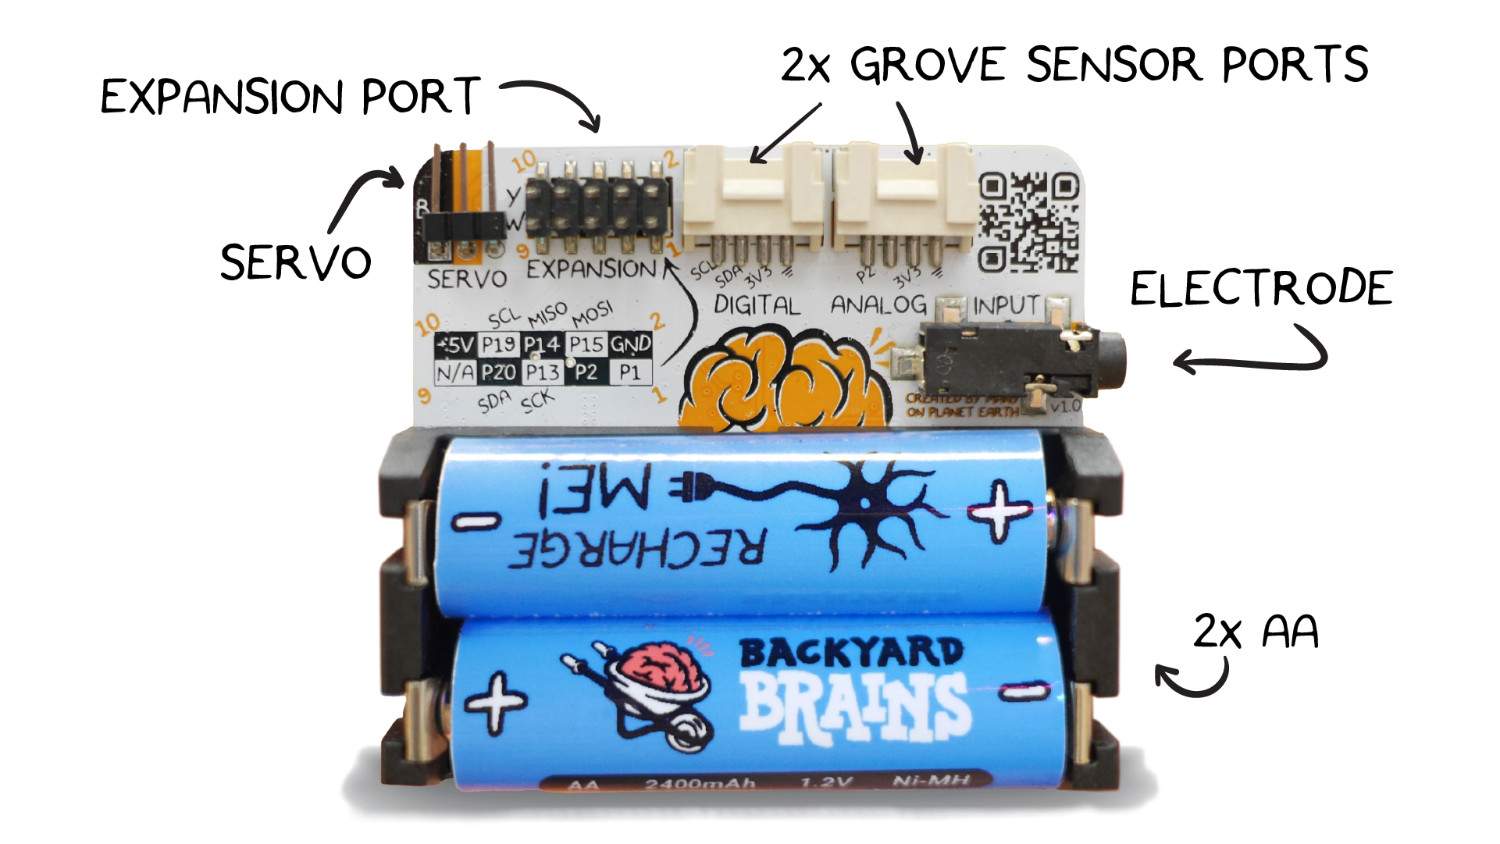
| Power source | 2x AA Battery |
| Recording Modes | EMG, ECG |
| Outputs | 1x Servo, 1x Expansion Port |
| Inputs | 1x Orange Electrode Cable |
Hardware Overview
The Spiker:bit is designed for simple interfacing with both micro:bit V1 and V2 boards via an edge connector slot.
To record body signals, use the orange Backyard Brains electrode cable with three leads, two for recording and one for ground.
Software manages signal type selection, allowing you to toggle between EMG (muscle), ECG (heart), or EEG (brain) modes without needing physical switches.
Additional hardware components:
- Servo output on PIN 0 for actuator control
- Expansion port located on the underside, exposing GPIO pins for prototyping and higher-level integrations
- Grove connectors (digital, serial, and analog) for quickly adding more sensors and modules to your experiments
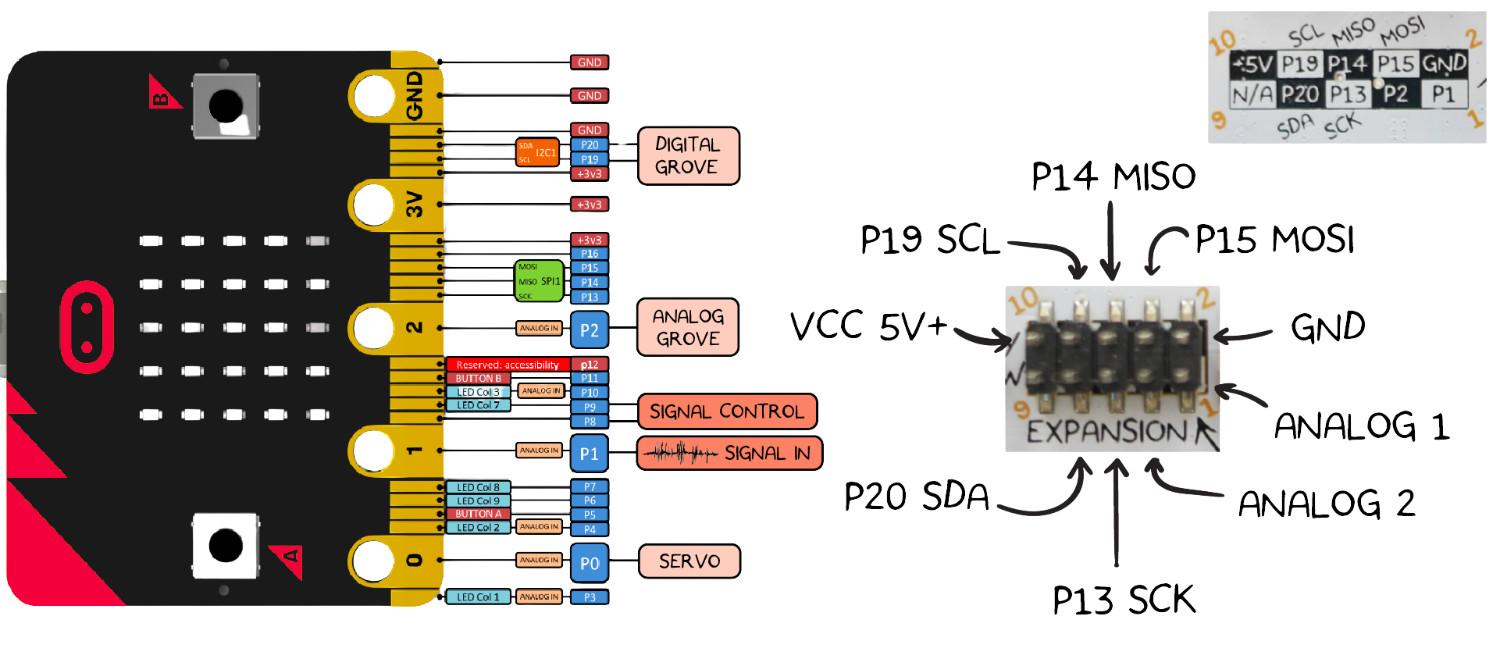
Pin Out
Getting Started
To begin using your Spiker:bit, gather the following materials:
- 3× BYB Large Muscle Electrodes
- 1× BYB Orange Electrode Cable
- 1× Spiker:bit
- 1× micro:bit
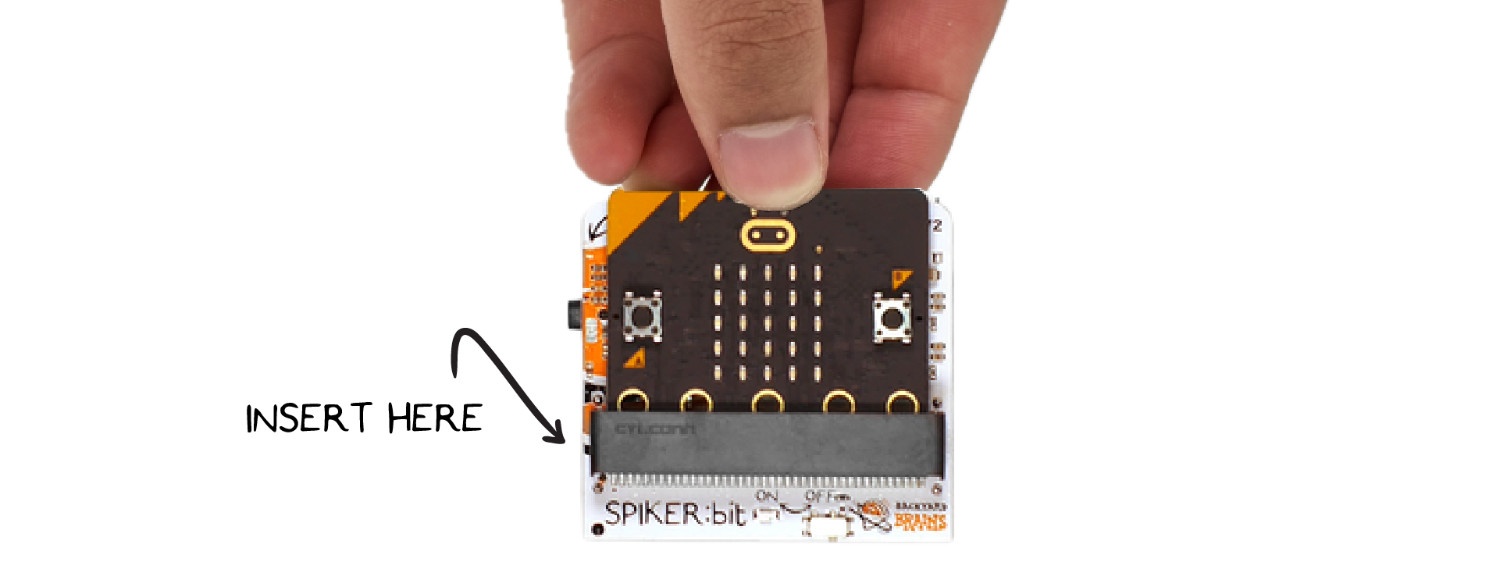
Step 1: Connect the micro:bit
Insert the micro:bit into the front slot on the Spiker:bit. Make sure the LEDs on the micro:bit are facing outward.Then, connect the orange electrode cable to the electrode port on the side of the Spiker:bit.
Step 2: Power and Program
Connect the USB cable from your computer to the micro:bit to power it and upload your code.

Alternatively, you can program the micro:bit wirelessly using the micro:bit app, available on the App Store or Google Play.

Experiments and Tutorials
To get started, you'll first need to install the Spiker:bit Extension. Here's how:
Follow the official instructions to install the Spiker:bit extension on you Make Code editor:
Once you have the extension installed, you’re all set to begin programming your Spiker:bit! You can dive into our tutorials to explore both Block Programming and Python:
Explore our tutorials to learn both Block Programming and Python:
To see how this can be applied in a real-world project, check out our DIY Hand Neuroprosthetic experiment.