Events and averages
Event marks identify moments such as a stimulus, a movement, or the start of a trial. They give you a reference time for comparing the signal before and after something happened.
Add a mark
With a device connected or recording open, press a number key such as 1 to place that event at the current signal/playback time. In the sample below, pressing 1 added an Event 1 marker.
For touch controls or named events, open SpikerBox → Events. Add or edit an event label there. Adding or editing a label makes the event-marking control available on Signal and Spectrum; use it to choose and place a mark. You can also configure labels before a recording.
The menu manages event labels. The Events tab at the bottom displays analysis.
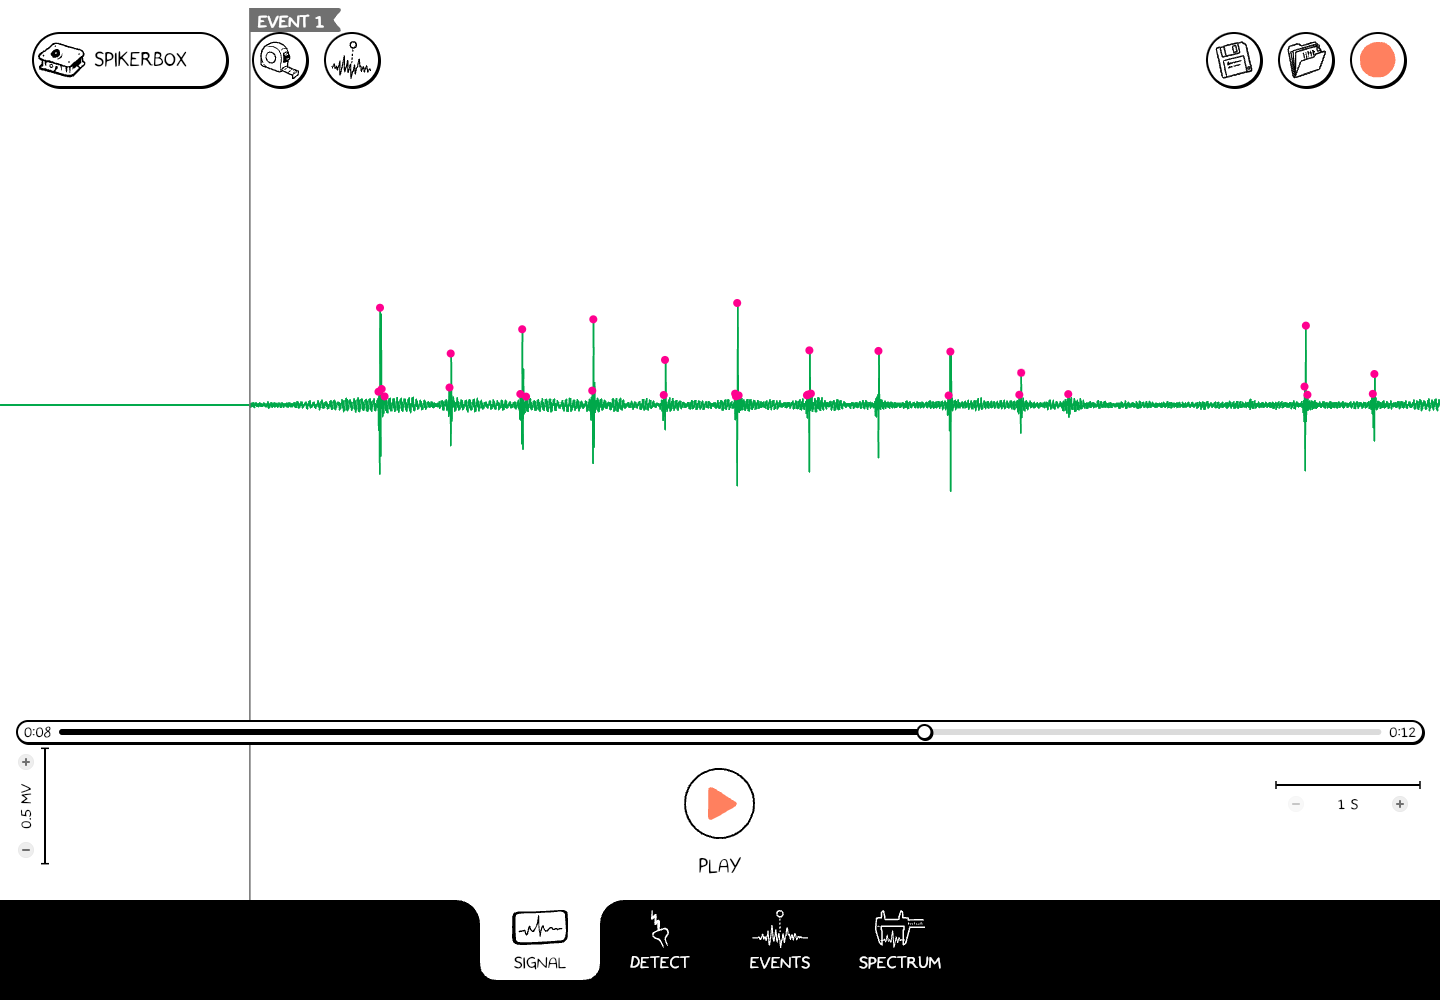
An event added to an opened recording. The Save disk shows that edits still need saving.
Keep your marks
For an active recording, marks within the recorded interval are included when you Stop and save. For edits to an opened recording, press the Save disk and finish the save step. Merely seeing a marker on screen does not mean it has been written to the file.
Compare waveforms in Events
- Select spikes in Detect or add event marks.
- Open the Events tab.
- Choose an available spike train or event entry from the list.
- Inspect the average waveform around those times. The standard-deviation display shows how much the contributing waveforms vary.
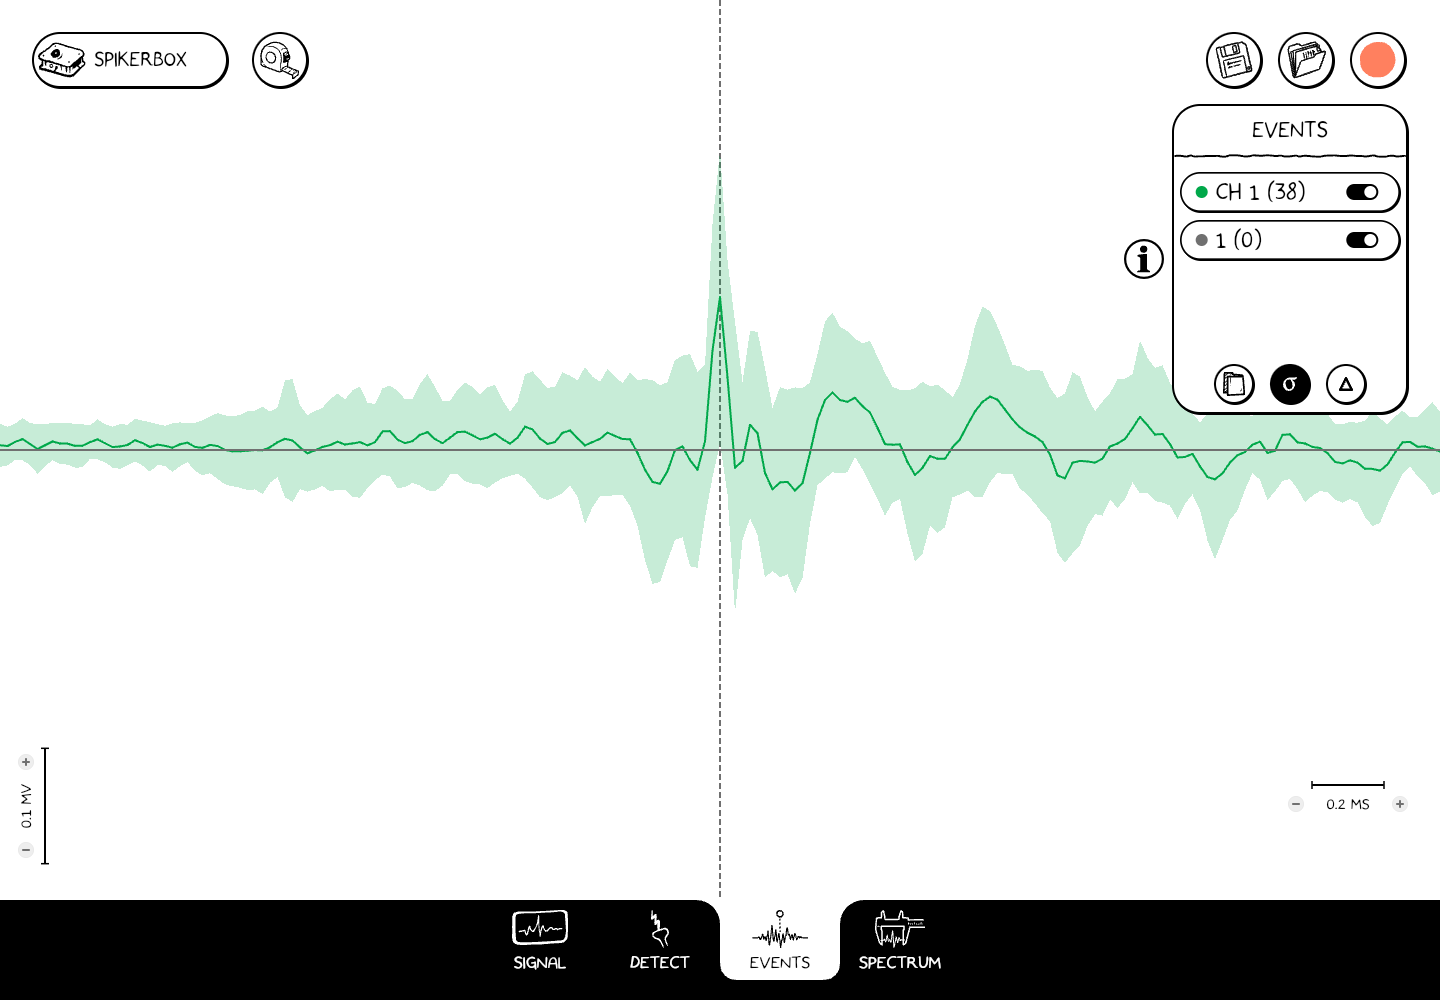
An average from selected CH 1 spikes in the sample recording. The counts and waveform depend on the recording and detection settings.
An empty entry or a count of zero has no contributing waveforms to average. Check that the intended channel is enabled, that spikes or marks exist, and that you selected the correct entry.